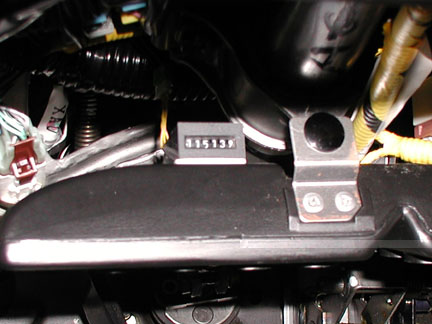
Mod 2 adds a VTEC counter to tally the number of times VTEC is activated. I installed mine just before leaving my car at the dealer for several in-warranty repairs. The counter read 115096 when I dropped it off, and the same when I picked it up. Now I know how they drive my car when I'm not watching.
After a week of me driving the car, the counter read 115139, so I hit VTEC 43 times
in a week. I don't know if that's good or bad. ![]()
| Remove interior trim panels (driver's side foot well) | |
| Splice wires using crimp connectors (1 wire under the dash) |
| 12 volt DC mechanical counter, non-resetting, low current type | |
| Wire and connectors |
Unfortunately, I have not yet found a good source for mechanical counters. I used a counter I had sitting around in my junk drawer. Well, my junk basement. It happened to be a 24 volt mechanical counter but works fine on 12 volts, and only draws 10 milliamps, so it won't overload the VTEC circuit on the ECU.
I was able to locate a counter from Digi-Key that might work. It's an electronic counter (LCD display) and is designed for 5 to 12 volt operation. Digi-Key's part # is 267-1011-ND, and it sells for $23.96. Go to www.digikey.com and do a search on that part number. If you know of a good source for a counter that may work in this application, email me at bob@baustnet.com .
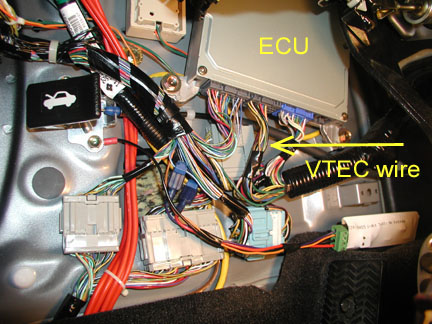
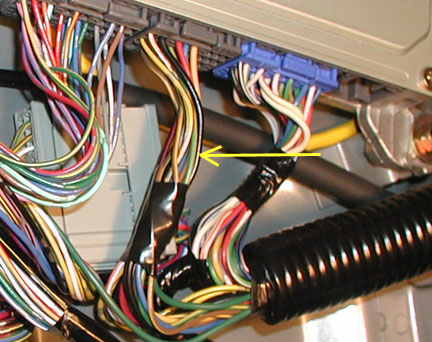
| (A) Picture of ECU connection | (B) Close-up of ECU connector |
 |
 |
|
|
|
| (C) Photo of my counter installed above the air diffuser | |
 |