The inspiration - I had heard on S2Ki that
there was a hollow space under the passenger floor, and it sounded like a
perfect way to gain some additional cabinet volume for an inside sub woofer.
Hmmmm.
Since I travel a lot and can't do without the trunk space, a trunk sub was
out of the question. Heck, I've already got my tools moved into the spare
tire so I could use the tool well space for luggage. Besides, I figured it wouldn't
take as big a sub or as much power if the sub was inside the car, saving money, and it
eliminates all the trunk rattle problems too.
The plan - Find out how much room was there,
and locate a decent driver that would fit in the available space and would work in a very
small enclosure. I wanted an inside sub, but not at the expense of 6 - 8
inches of leg room. I knew I couldn't fit a 12" in there, but decided to
try to fit a 10" sub, since there is a big difference in output between an 8 and
a 10. After some Internet searching and running output curves on 6 or 8 different drivers, I made a
choice.
Sub woofer - Ultimate PS10 10" subwoofer. 130
Watts rms, 7mm x-max. I chose it because it would work in a small sealed
cabinet (.5 cu ft or 14 liters), had decent x-max, and was not too deep (5.5").
I also had to have a speaker with a magnet assembly no larger than 5" in
diameter, since it had to fit inside the hole I cut in the floor (see below) in
order to keep the cabinet depth minimal. And it was cheap, ($60), which is
always a good thing.
Amplifier - Blaupunkt plastic amp, 75 W rms,
150 W bridged. Cost $79 on sale at Frye's (in CA).
This amp is supposed to put out over 200 watts into 4 ohms bridged, according to
the factory testing. It was small, made little heat, and was only $79.
Did I mention it only cost $79?
The results - it took about 15 hours, but
then I'm slow and tedious. But it was worth it. I now have good,
tight, bass you can easily hear and feel at highway speeds. It won't annoy
drivers for a 3-block radius, but it's enough for me.
The installation - photos are click-able for
enlargements.
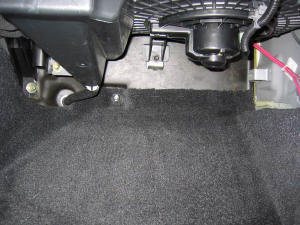
| This is what the passenger floor area looks
like to start with. This is the view from the front edge of the
passenger seat, looking forward. That's the AC evaporator (with drain
hose) on the top left, and the fan motor on the top right. Step 1 -
remove the seat and the carpeting.
|
 |
| |
|
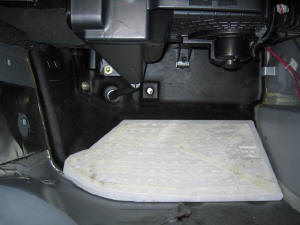
| OK, carpeting out. See that big white
thing? To Honda, that's a foam spacer to provide an angled area for
your feet to rest on. To me, that's valuable space for a speaker
cabinet - out with it ! ! Behind the white foam spacer is a
sound deadening pad (the black part), and is 1" thick foam rubber with a
rubber facing. It covers the whole firewall.
I figure I'll be drowning out those pesky engine noises, so out with
the rubber pad too, besides, I need the extra 1" of depth I'll get with the
pad removed. |
 |
| |
|
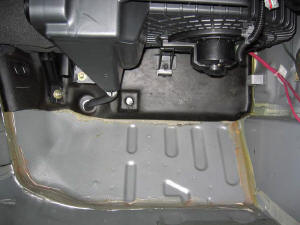
| Here's what it looks like with the foam
spacer removed and the sound pad cut away where the speaker will mount.
Can you see the spot welds in the angled area of the floor? That's
where the floor pan is attached to the frame of the car.
We don't want to mess with those welds, but the area to the right and
above them is a hollow space that opens up into the sub-frame.
So if I cut a hole there I can gain access to that space in the frame, which
will increase the size of my speaker cabinet. |
 |
| |
|
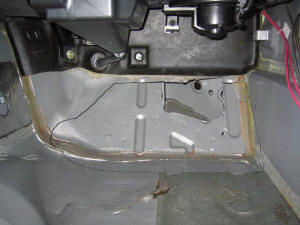
| Voila! Instant hole in the floor.
What you see through the hole is the inside of the sub-frame, which is a
pretty big hollow space. I can't make the hole big enough to mount a
speaker directly on the floor without cutting into the frame, but it is
large enough to allow the magnet to extend into the frame space, allowing me
to mount the sub closer to the floor, and take up less foot room..
The black line on the floor is the outline of the foam spacer that was
removed. See how much of the floor space it took up. |
 |
| |
|
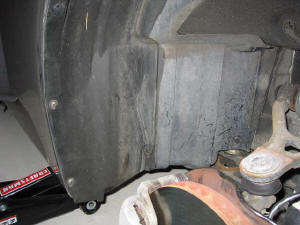
| Just where is that sub-frame, and what does
it look like? Here's a view of the inside of the right-front fender
well, looking back towards the passenger area. You can see the brake
rotor at the bottom, and my floor jack, which is under the door hinge area.
In the next picture I'll peel back the plastic fender lining to give
you a look at the frame. |
 |
| |
|
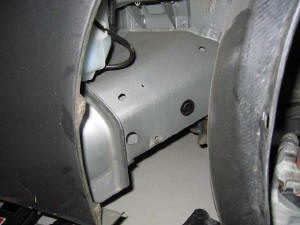
| Here it is - the part of the frame that
connects the side frame (under the door sills) to that beefy center hump.
This is actually two tubes of sheet metal, one inside the other.
The small holes are for attaching the fender lining, but those big ones are
there for ??? |
 |
| |
|
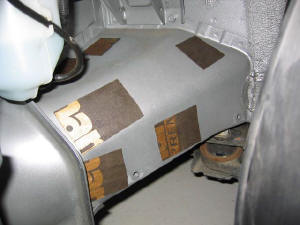
| I covered the big holes with Dynamat to seal
the "speaker enclosure" and to keep out road noise, since sound coming in
through those holes will make it's way into the cabin through the speaker
cone. There are holes in the bottom of the frame too, but I didn't
take a picture of them (you can use your imagination).
Yes, that's the windshield washer bottle in the upper left corner of
the photo. |
 |
| |
|
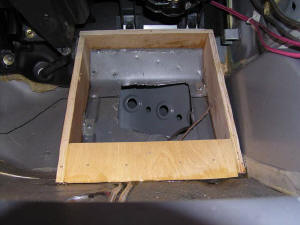
| The basic cabinet frame, made of 1/2" birch
plywood, is installed. Half-inch is a little thin for a sub box, but
it's only 4" wide, so there won't be much panel flex. It's attached at
the top by two metal brackets that are bolted to existing fasteners that
hold the fan assembly to the firewall. There are also metal
brackets screwed into the floor, and the whole thing is glued to the floor
with that clear "Magic Glue" stuff that never hardens completely but sticks
to everything. Notice the wires routed in a depression in the floor
pan, and glued in place. |
 |
| |
|
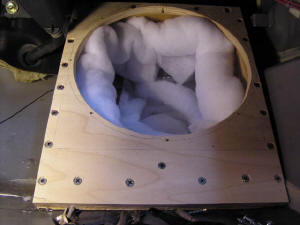
| Now we're getting somewhere. I'm not
sure, but do you think I could fit one more screw on that baffle board?
It's the same 1/2" plywood, and stiffness is the name of the game, so I made
sure it had no wiggle room. I've also added stuffing, both in the
frame section and the wooden part of the "cabinet".
Notice the bottom edge of the front panel is about even with where the
old white foam spacer used to be (black mark on floor). |
 |
| |
|
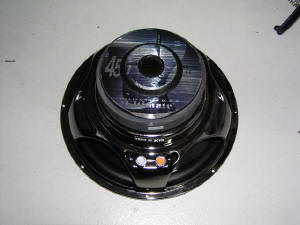
| Here's the lucky driver. It's a modest
Ultimate PS10, only cost me $60. 130W rms, 7mm x-max. Of course
the speaker has a nice big "450 Watt" sticker on it. Right.
Notice the bottom edge of the magnet assembly has been shaved off slightly,
right below where it says "Ultimate". A trial fit found it hitting the
inside of the sub-frame (the magnet assembly fits into the hole in the
floor). So I ground it off to make sure it didn't vibrate. |
 |
| |
|
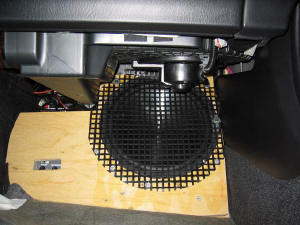
| I added another layer of plywood to give the
speaker some room to move, since I wanted to install a flush speaker grill
to protect it from feet. I forgot to take a photo of the amp, but
there's a 150W (bridged) Blaupunkt plastic amp crammed to the left of
the speaker and behind the plywood. I did leave a hole to adjust the
amp. Oh, there's a 12v cooling fan in there too, just to circulate the
air some. |
 |
| |
|
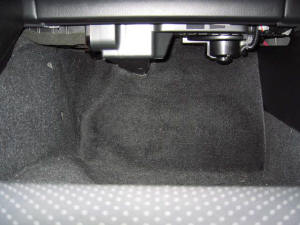
| That's it. All done. The carpet
lays back down over the sub, and doesn't seem to block the sound much at
all. I compared my leg room to a stock car, measured from the
front edge of the seat. To the "crease" in the floor, I have about
1/2" less than stock. At the highest part of the "angled area" I have
3" less than stock.
Not bad for a 5 1/2" deep speaker, plus cabinet. |
 |
| |
|


